This post started out about our garage and I got off track
So you thought that once we moved into the house the projects were all finished? Haha. My husband thought that too. Well probably not, because he knows that we will probably *never* be finished with all the things that need to be done. When we start a project, we find at least 2 more things to add to the list.
I started this post just now and realized that I never shared pictures of the new appliances and new cabinet hardware in the kitchen. So it's a 2-for-1 post!
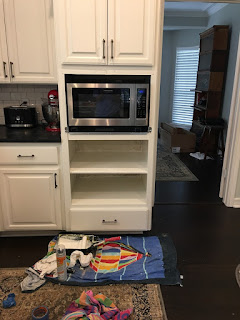
This photo was taken before the new appliances, but after they had been ordered. There was a 2-3 week wait for the new stuff, so it gave me time to decide to get new cabinet hardware to match the appliances.

Then we got the call to schedule delivery, and we had to prep. The doors had to come off the old fridge to get it out of the front door. Pulled out the range oven. Somehow I do not recall laying the hardwood floors underneath the oven. I must have blocked it out.

We had a 1993 model oven/microwave combo unit (yes, we had TWO ovens! in 2 different kinds of units! this kitchen designer was GENIUS!) that complicated the appliance replacement process. Those cabinets are 27 inches wide, so the unit is about 25 inches wide. They are phasing out production of these combo units (I cannot understand why! /s), so the only available one - which did not match my chosen line of appliances - was 30 inches wide. What to do, what to do. We decided to go with just a microwave and try to figure out what to do with the extra space below. That is how you do this DIY stuff. You totally wing it.


The truck arrives!

Removal of refrigerator and clean-up. We've had a tarantula that was hiding in our kitchen since we moved (that my daughter finally removed for us), so I wanted to make sure that it was extra clean under there. You know how tarantulas are repelled by cleanliness, right?! There is no logic to how you respond when you find a gigantic tarantula in your kitchen.


New fridge and dishwasher in place.


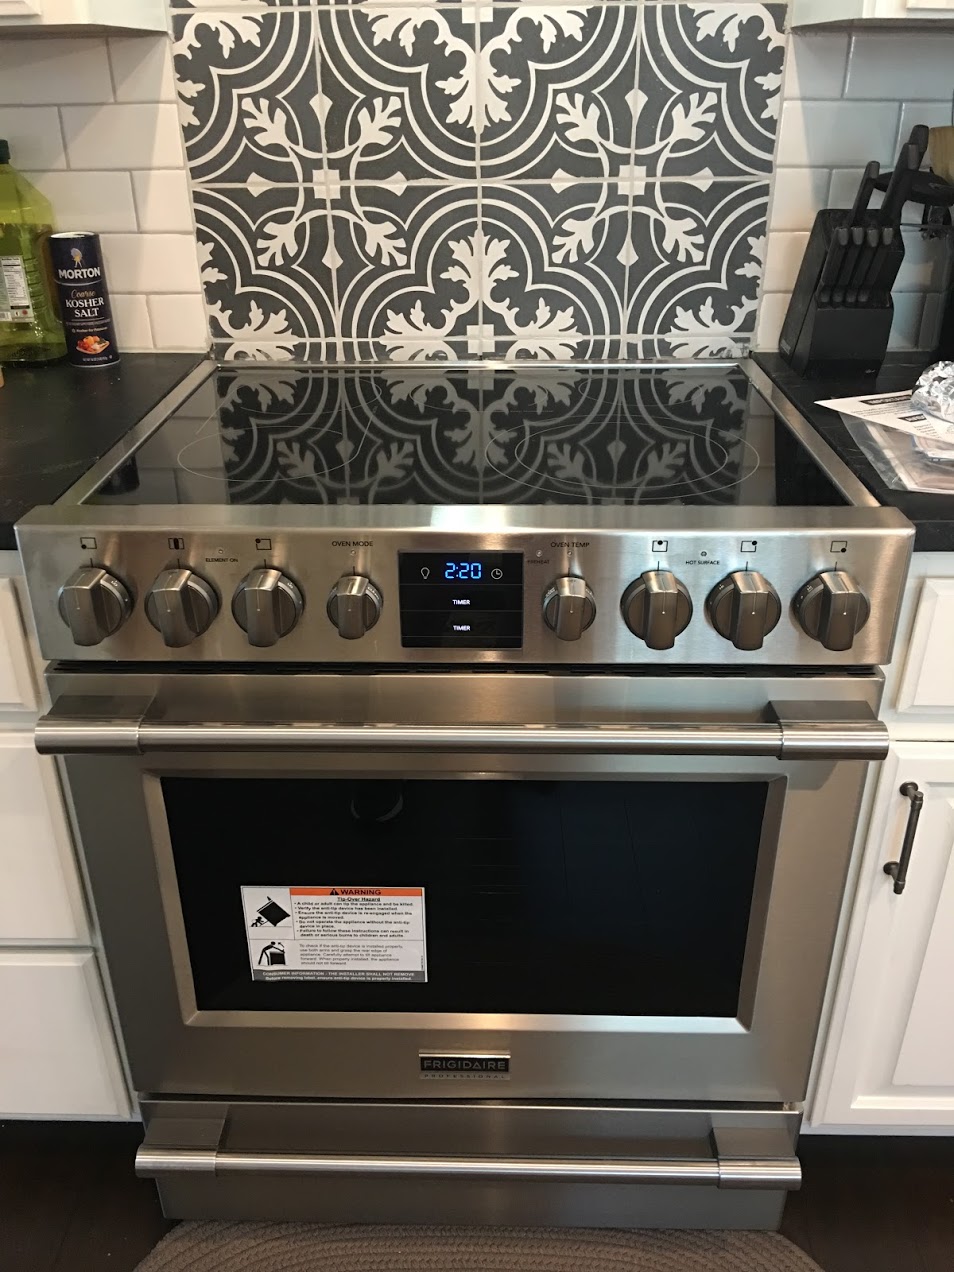
Close-ups of dishwasher and electric range. Now you can see why I needed to change the hardware because these were made for this kitchen with these appliances.


We were left with a microwave and trim kit in a box, so we had to decide what to do to make a place for it. Here's what we did:


Of course, there nothing was done to code back there behind where the electrical for the combo unit lived, so my husband had to install a box for the microwave outlet. There was also a 220V connection back there, but we just put a box in and a faceplate over it to secure it properly since we won't be using it. There was some drywall patching and wall texture required.
We installed a shelf underneath and put the trim kit on the microwave.


Some trim work and paint, and it's almost done. When I took these pics, I was waiting for the wall texture to dry before I painted over it.

So now I've told you all about our kitchen in the post that was supposed to be about the garage floor. Congratulations! You get to read on!
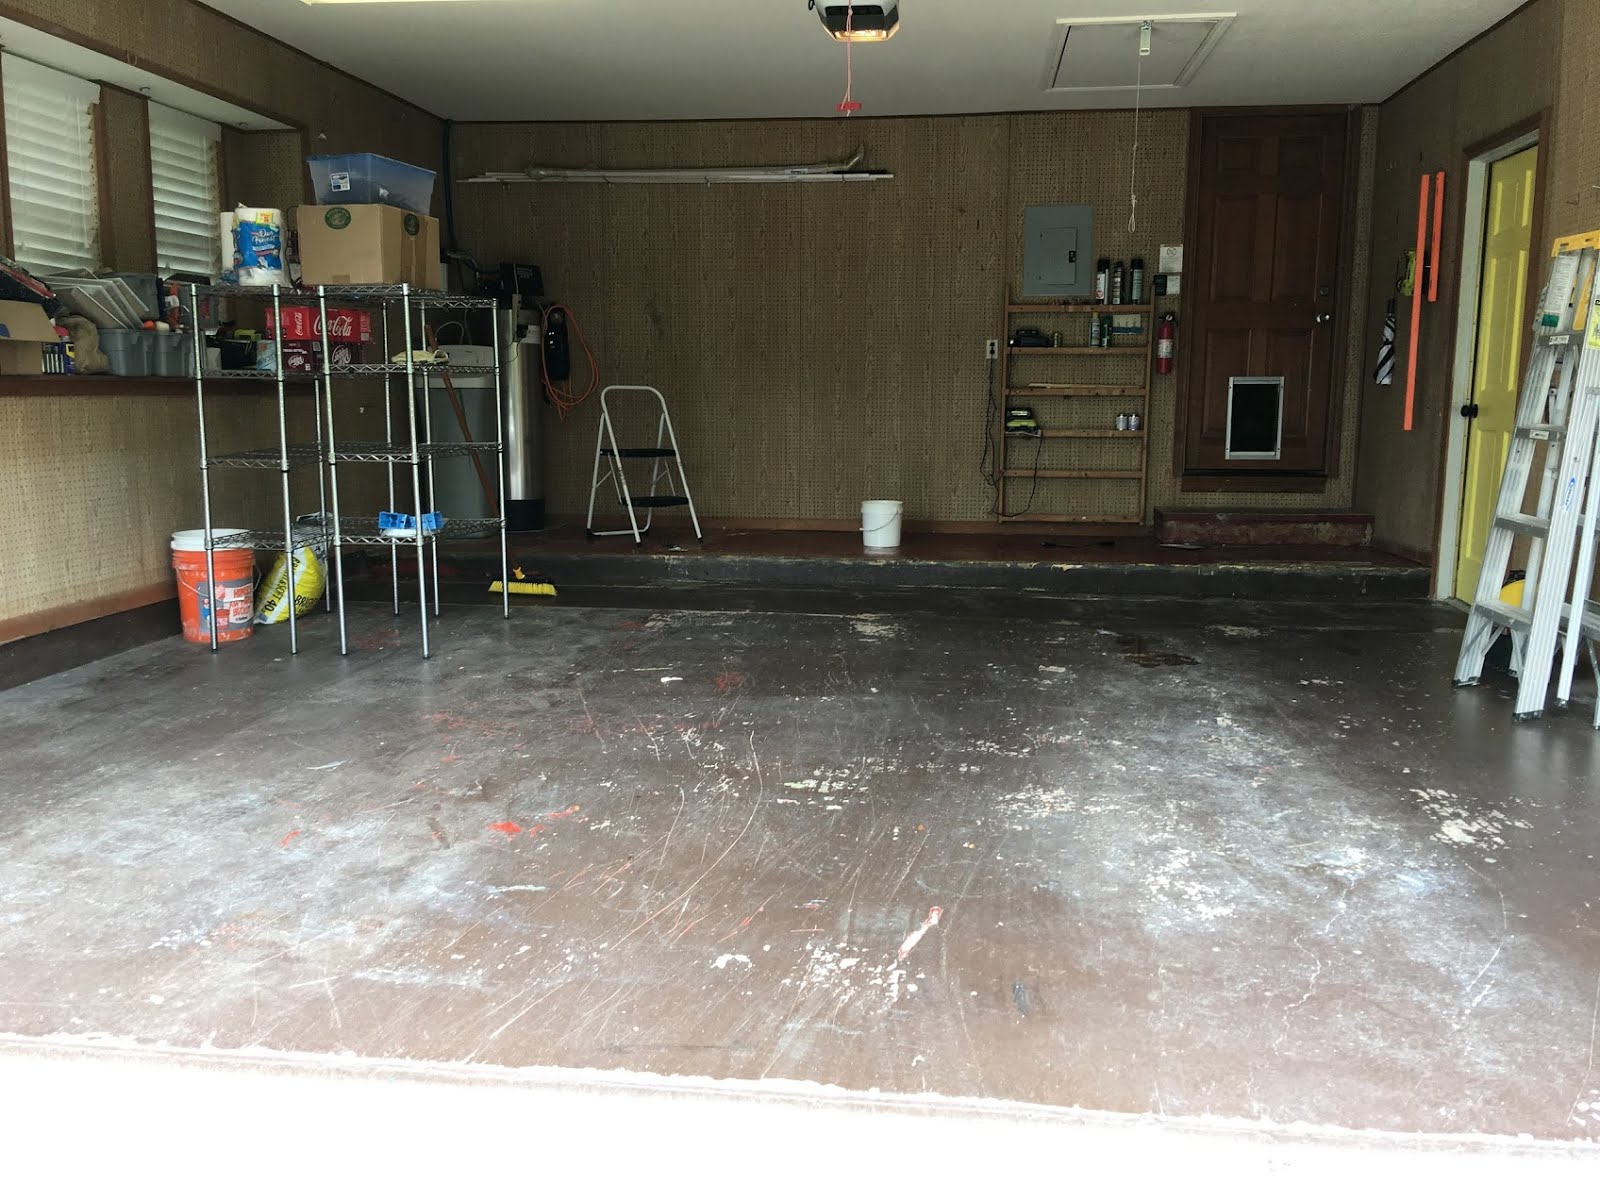
We had an epoxy coat on the floor of our old garage, and I really liked it so I knew that I wanted to do the same for the UF. I had gotten tired of going to Home Depot all the time, so I really showed them and I ordered the stuff online (from the Home Depot website). Take that! But not so fast. I was just going to power wash the floor plop down this epoxy stuff. Until my husband got involved. Then we needed to strip the paint off the floor. Oh and we also ripped out the step at the door to the garage because it turns out it was made of wood (covered in vinyl stick-on flooring).


Don't be fooled. Chemical strippers rarely do the job completely. We ended up renting a diamond blade scraping machine (that I'm sure is called something else) to get the concrete completely clean. Per my husband's decree "it MUST be clean!"


Then we built a concrete step to replace what we ripped out.

Then came the epoxy and the paint flecks. There is no picture during this process, because you have about 0.825 seconds to get the stuff down and throw the confetti flakes before the stuff starts to dry. Plus, you have to figure out how to do it without needing to walk back over what you've already covered. And it requires some ninja skills.


Fun fact: the clear coat on top costs more than the epoxy stuff. And in an Incident that We Do Not Speak Of, we wasted an entire bag of clear coat. The clear coat is more difficult to apply, because YOU CANNOT SEE WHERE YOU'VE ALREADY ROLLED. One day, we will need to do a second (or third, if you're counting bags of the stuff) coat. But for now, it looks great and our garage does not feel creepy any more.
I started this post just now and realized that I never shared pictures of the new appliances and new cabinet hardware in the kitchen. So it's a 2-for-1 post!
This photo was taken before the new appliances, but after they had been ordered. There was a 2-3 week wait for the new stuff, so it gave me time to decide to get new cabinet hardware to match the appliances.

Then we got the call to schedule delivery, and we had to prep. The doors had to come off the old fridge to get it out of the front door. Pulled out the range oven. Somehow I do not recall laying the hardwood floors underneath the oven. I must have blocked it out.

We had a 1993 model oven/microwave combo unit (yes, we had TWO ovens! in 2 different kinds of units! this kitchen designer was GENIUS!) that complicated the appliance replacement process. Those cabinets are 27 inches wide, so the unit is about 25 inches wide. They are phasing out production of these combo units (I cannot understand why! /s), so the only available one - which did not match my chosen line of appliances - was 30 inches wide. What to do, what to do. We decided to go with just a microwave and try to figure out what to do with the extra space below. That is how you do this DIY stuff. You totally wing it.


The truck arrives!

Removal of refrigerator and clean-up. We've had a tarantula that was hiding in our kitchen since we moved (that my daughter finally removed for us), so I wanted to make sure that it was extra clean under there. You know how tarantulas are repelled by cleanliness, right?! There is no logic to how you respond when you find a gigantic tarantula in your kitchen.


New fridge and dishwasher in place.


Close-ups of dishwasher and electric range. Now you can see why I needed to change the hardware because these were made for this kitchen with these appliances.

We were left with a microwave and trim kit in a box, so we had to decide what to do to make a place for it. Here's what we did:


Of course, there nothing was done to code back there behind where the electrical for the combo unit lived, so my husband had to install a box for the microwave outlet. There was also a 220V connection back there, but we just put a box in and a faceplate over it to secure it properly since we won't be using it. There was some drywall patching and wall texture required.
We installed a shelf underneath and put the trim kit on the microwave.


Some trim work and paint, and it's almost done. When I took these pics, I was waiting for the wall texture to dry before I painted over it.


So now I've told you all about our kitchen in the post that was supposed to be about the garage floor. Congratulations! You get to read on!
We had an epoxy coat on the floor of our old garage, and I really liked it so I knew that I wanted to do the same for the UF. I had gotten tired of going to Home Depot all the time, so I really showed them and I ordered the stuff online (from the Home Depot website). Take that! But not so fast. I was just going to power wash the floor plop down this epoxy stuff. Until my husband got involved. Then we needed to strip the paint off the floor. Oh and we also ripped out the step at the door to the garage because it turns out it was made of wood (covered in vinyl stick-on flooring).


Don't be fooled. Chemical strippers rarely do the job completely. We ended up renting a diamond blade scraping machine (that I'm sure is called something else) to get the concrete completely clean. Per my husband's decree "it MUST be clean!"


Then we built a concrete step to replace what we ripped out.

Then came the epoxy and the paint flecks. There is no picture during this process, because you have about 0.825 seconds to get the stuff down and throw the confetti flakes before the stuff starts to dry. Plus, you have to figure out how to do it without needing to walk back over what you've already covered. And it requires some ninja skills.


Fun fact: the clear coat on top costs more than the epoxy stuff. And in an Incident that We Do Not Speak Of, we wasted an entire bag of clear coat. The clear coat is more difficult to apply, because YOU CANNOT SEE WHERE YOU'VE ALREADY ROLLED. One day, we will need to do a second (or third, if you're counting bags of the stuff) coat. But for now, it looks great and our garage does not feel creepy any more.

Informative and motivating content! I love how you included budget-friendly renovation strategies that still look professional. Definitely sharing this with my friends planning upgrades.Read more info about kitchen contractor Westchester county NY
ReplyDelete